The TextView is a widget in Android that allows you to display text to the user. It is also possible to use the Android TextView widget to create a hyperlink which can load a web page in a mobile web browser when clicked.
To create a clickable hyperlink in your Android app using the TextView widget follow the steps below.
- Create a new String resource in the strings.xml resource file representing the text to be placed inside the TextView
- In your String resource use HTML markup to insert the hyperlink using an anchor tag
- Add a TextView in the layout of your Activity or Fragment and use the android:text attribute on the TextView to reference the String resource containing the hyperlink
- In your Activity or Fragment class use the setMovementMethod(…) on the TextView to enable the hyperlink
In the article below I will include Java and Kotlin code samples that show how to create a hyperlink using the Android TextView following the steps listed above.
I have also included some additional instructions along with code samples written in Kotlin for using links in Android apps in different ways such as:
- How to Change the Hyperlink Text Color in a TextView
- How to Create a Clickable Link to a Website Using a Button in Android
- How to Create a Clickable Link to Another Activity in a TextView
Android TextView Hyperlink Tutorial
Below is a screenshot of an Android app we will be building in this tutorial for creating a hyperlink using the Android TextView widget. When the hyperlink is selected the app will open a mobile web browser and navigate the user to the website http://10.0.0.14:32769

In this tutorial will cover the following steps for creating a hyperlink using the Android TextView widget.
- Creating a String Resource for the Hyperlink in HTML Markup
- Creating an Activity Layout File with a TextView
- Enabling the TextView Hyperlink in the Activity or Fragment Class
I will include code excerpts embedded into this tutorial. For step 3, I have included code samples for both Kotlin and Java.
I have created a video tutorial embedded below on how to create a hyperlink inside a TextView in an Android app. The code written in this video tutorial is also available on GitHub.
Creating a String Resource for the Hyperlink in HTML Markup
The first part of this tutorial for creating a hyperlink using the Android TextView widget will require you to add a new String Resource into the strings.xml file that will represent the text that will be used by the TextView for the hyperlink.
You will need to use HTML markup when writing your hyperlink in your resource file. This means you will need to use an anchor tag and use the href attribute on the anchor tag to capture the URI. Inside the anchor tag you will also need to add some text that will be displayed as a hyperlink to the user in the app.
You can also add a description to the link above or next to the link by adding some text outside of the anchor text in the String Resource. In my example I have also added a new line between my description of the link and the clickable link.
See the code sample of the strings.xml resource file below containing the hyperlink String resource.
Creating an Activity Layout File with a TextView
The next step in this tutorial will involve setting up the layout file for your Activity or Fragment that will contain the hyperlink TextView.
When you are creating the TextView in the layout file you will need to take care of a few things.
- Give the TextView an id using the “android:id” attribute so that you can reference it in the next part of the tutorial in your Activity or Fragment class
- Use the “android:text” attribute to reference the String resource you have created above for your hyperlink
- If you the text shown in the TextView is going to spill over one row consider centering the TextView by setting the “android:textAlignment” attribute to the value of “center”
See the code sample of the activity_main.xml layout resource file below containing a TextView to be shown inside a ConstraintLayout.
Enabling the TextView Hyperlink in the Activity or Fragment Class
The final step of this tutorial involves enabling the hyperlink to be clickable in your Activity or Fragment class by using the setMovementMethod(…) on the TextView.
The setMovementMethod(…) takes a MovementMethod as a parameter. In this tutorial we will be making use of the LinkMovementMethod allow the hyperlink to be clickable and to handle the launching of the web browser and navigation to the link in the browser when selected.
Java Example
See the code sample of the MainActivity.java Activity class file below showing the enabling of the hyperlink using setMovementMethod(…)
Kotlin Example
See the code sample of the MainActivity.kt Activity class file below showing the enabling of the hyperlink using setMovementMethod(…)
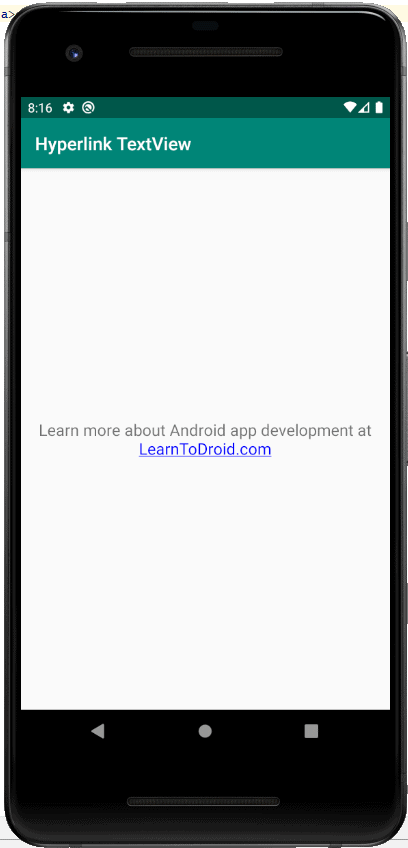
How to Change the Hyperlink Text Color in a TextView
By default the hyperlinks shown in your Android TextView widget will be displayed in a dark pink text color with an underline.
You can change the default color of the text of the hyperlink using the setLinkTextColor(…) method on the TextView.
See the code sample of the MainActivity.kt Activity class file below setting the color of the hyperlink in the TextView to blue using setLinkTextColor(…)
See a screenshot showing the hyperlink inside the TextView in blue using the code from the excerpt above.
How to Create a Clickable Link to a Website Using a Button in Android
You can also use a Button widget in Android to load a web page in the mobile browser when clicked.
To do this you will need to make use of an Intent and use the startActivity(…) method to launch an Intent when the Button is clicked.
See the code sample of the MainActivity.kt Activity class file below showing how to use a Button to launch a web browser on the device at a given URI when clicked.
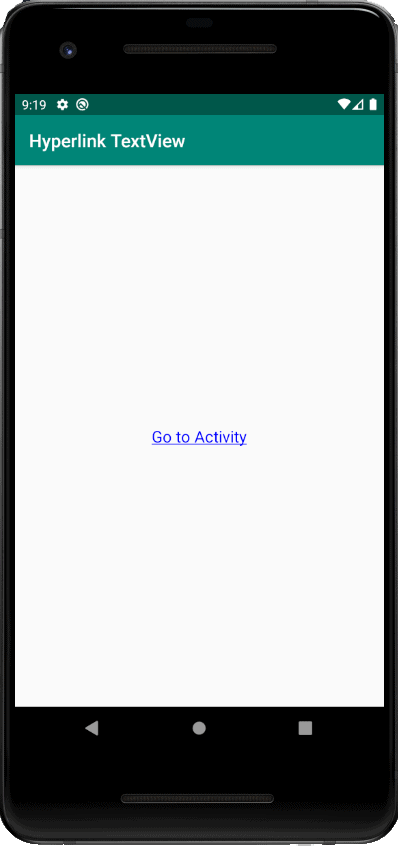
How to Create a Clickable Link to Another Activity in a TextView
I have written another blog post on this website about how to switch between Activities in Android using an Intent. To learn more about this including an example using a Button to switch between Activities using an Intent check out the article below.
If you want to use a TextView instead of a Button to create a link to another Activity you can take the code samples from that lesson and replace the Button with a TextView. You will need to style the text shown in the TextView to look like a hyperlink by setting the text color to blue and adding an underline. There you will need to add an OnClickListener to create the Intent when the TextView is selected.
See the code excerpt from the IntentNavigationActivity.kt Activity class file below which shows setting the text color of the TextView to blue and adding an on click listener to switch to the MainActivity using an Intent when the TextView is clicked.
See the code sample of the activity_intent_navigation.xml layout resource file below containing a TextView to be shown inside a ConstraintLayout.
See the code sample of the strings.xml resource file below containing String Resource for the activity link which is underlined using HTML markup.
You will ensure need to use you have included references to all of the Activities you will be using and navigating between in your manifest file. This is done using the activity tag inside the application tag of the Android Manifest file.