
Switching between fragments within an activity in Android has been a painful experience in the past. Using the fragment manager and fragment transactions to switch between fragments was never a great developer experience.
As a part of the Android Jetpack suite of libraries and tools, the Navigation Architecture Component has been made available to Android developers to help simplify navigation within your Android app.
To move between fragments within an activity using the Navigation Architecture Component in JetPack, you need to follow these steps.
- Add the dependencies for the navigation component
- Create the navigation graph resource
- Add the NavHostFragment to the MainActivity layout
- Create Actions enabling navigation between Destinations in the Navigation Graph
- Use the NavController to Programmatically Navigate Between Fragments
In the blog post below I will take you through a step by step guide on how to use the navigation component in Java to navigate between two different fragments within an app with a single activity.
A video version of this tutorial is available on YouTube which is also embedded below.
Navigation Architecture Component Overview
What are the benefits of using the Navigation Architecture Component?
Some of the benefits of using the Navigation Architecture Component quoted from the official documentation include the following.
Handling fragment transactions.
Handling Up and Back actions correctly by default.
Providing standardized resources for animations and transitions.
Implementing and handling deep linking.
Including Navigation UI patterns, such as navigation drawers and bottom navigation, with minimal additional work.
Safe Args – a Gradle plugin that provides type safety when navigating and passing data between destinations.
ViewModelsupport – you can scope aViewModelto a navigation graph to share UI-related data between the graph’s destinations.
What is the Navigation Architecture Component?
The Navigation Architecture Component comprises of a number of different sub components which are used to handle navigation within an Android app, these include the following.
- The Navigation Graph
- The NavHostFragment
- The NavController
The Navigation Graph is a new resource type used to centralise information relating to navigation within your Android app including Destinations and Actions. Destinations are views that you can navigate to within your app such as Fragments or Activities. Actions represent the transitions a user can make between Destinations inside your app. The Navigation Graph is an XML file that can be modified manually but it can also be changed using the Navigation Editor available in Android Studio 3.3 and above.
The Navigation Editor shows a visual representation of your Navigation Graph in a directed graph. The nodes displayed in the Navigation Editor are the Destinations and the nodes are connected with the Actions. The Navigation Editor allows you to view and modify the Desintations and Actions to you will have in your app. The changes when made in the editor will be reflected in the Navigation Graph resource XML file allowing you to keep to track of changes in version control.
The NavHostFragment is placed inside the layout of your Activity and acts as a window allowing you to show the correct Fragment Destination within your Navigation Graph and swap it out with other Fragment Destinations as the user navigates through your app.
The NavController is used to navigate to a particular Destination within your Navigation Graph by referencing either a Destination or Action. The SafeArgs plugin can be used to support type safe navigation and argument passing when using the NavController.
Using Navigation Architecture Component in Java
Step 1: Adding the Navigation Component Dependencies
In order to use the navigation component in your Android project you will need to include the latest navigation-ui and navigation-fragment dependencies in your app’s build.grade file.
See the following excerpt from a build.gradle file in the app directory which includes the latest navigation architecture component dependencies.
It is also recommended that you update Android Studio to the latest version when using the navigation component as it requires a minimum Android Studio version of 3.3.
Step 2: Creating the Navigation Graph Resource
Note: This step will utilise the Navigation Editor in Android Studio, please make sure Android Studio is at least version 3.3 before you proceed.
The Navigation Graph is a new resource that will contain all of the information relating to navigation including all of the paths between destinations within your Android app.
To create a Navigation Graph resource in Android Studio, follow the steps below.
How to create a Navigation Graph in Android Studio 3.3+
- Right mouse click on the “res” directory located at app/src/main/res
- Hover over the “New” menu item
- Select the “Android Resource File” menu item
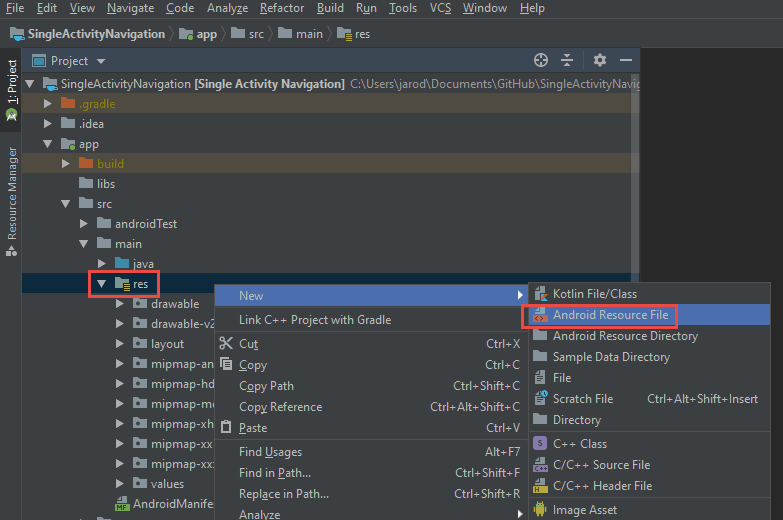
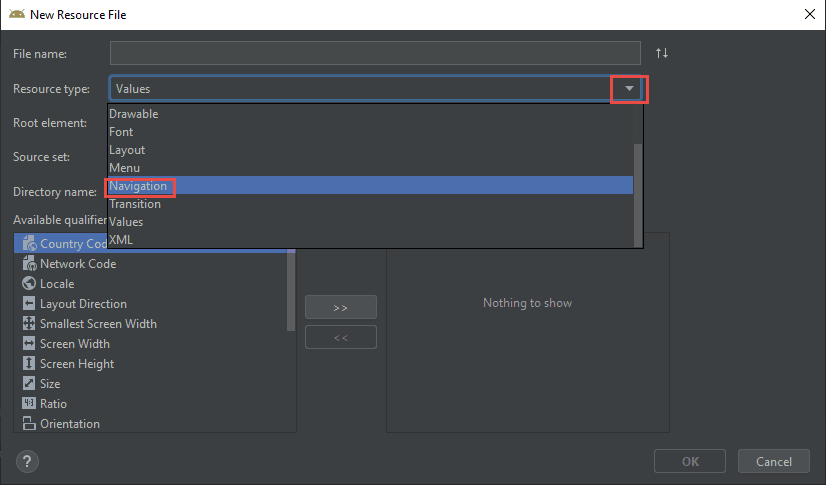
- Select “Navigation” as the Resource type
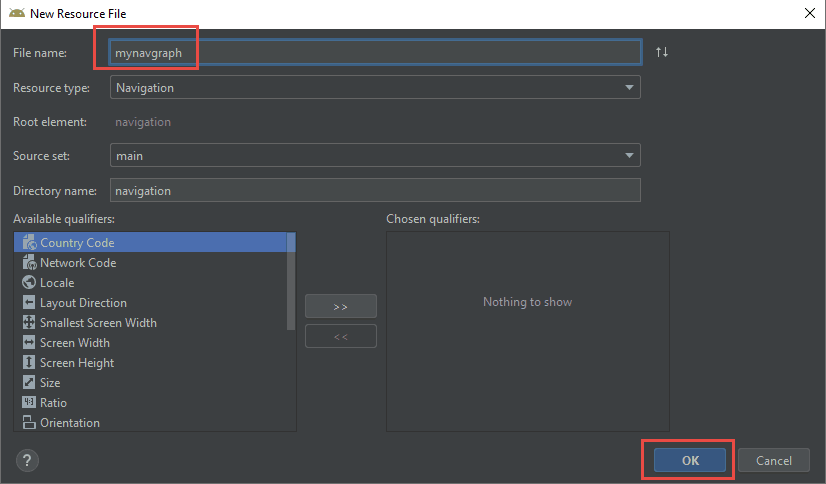
- Enter a file name for the Navigation Graph
- Select “OK”
Once the Navigation Graph is created you will be able to view the Navigation Graph in the “Design” view and in the “Text” view.
The “Design” view shows the Navigation Graph in the Navigation Editor.
The “Text” view shows the Navigation Graph as a text based XML file.
At the moment the Navigation Graph is empty, later in this tutorial I will show you how to add Fragments as Destinations and create Actions that allow you to navigate between Fragment Destinations.
Step 3: Adding the NavHostFragment to the Activity Layout
In order to navigate between fragments using the navigation architecture component we will need to be able to show the relevant fragment to the user based on where the user has navigated to within the app.
We will be placing a NavHostFragment inside the layout of the MainActivity which will act like a window for showing the right fragment back to the user as they navigate through the app.
The NavHostFragment is added via a fragment tag, the following attributes relating to navigation are set on the fragment tag.
- “android:name” is set to the type of NavHost we want to use, in this case we are using the NavHostFragment which is located at “androidx.navigation.fragment.NavHostFragment”
- “app:defaultNavHost” is set to true to make sure that the NavHostFragment will be able to intercept the usage of the back button
- “app:navGraph” will reference the navigation graph we have created in the previous step above
See an excerpt below which shows a NavHostFragment being added to the MainActivity layout.
If we run the app now it will crash as we have not yet added any fragments as destinations to the navigation graph. That means the app will not know what to show inside the NavHostFragment window. We will cover the creation of fragments and adding them to the navigation graph in the next step.
Step 4: Adding Fragments to the Navigation Graph as Destinations
For purposes of demonstrating the basic usage of the navigation architecture component I will be creating two simple fragments to be shown in this app, Fragment1 and Fragment2. They will both contain a simple TextView with the text “Fragment 1” and “Fragment 2” correspondingly. Fragment1 will also contain a button which will be used later in the tutorial to navigate to Fragment2.
See the code samples below for the Fragment1 and Fragment2 classes and layout files.
Fragment 1 Code Samples
Fragment 2 Code Samples
Now that these fragments have been created we will now proceed to add them as destinations to the navigation graph using the Navigation Editor inside Android Studio.
How to Add Fragment Destinations to a Navigation Graph in Android Studio 3.3+
- Double click the mynavgraph.xml file (created in Step 2) located in app/src/res/navigation
- Select the “Design” tab to open the Navigation Graph inside the Navigation Editor
- At the moment you should see a blank Navigation Graph without any Destinations or Actions
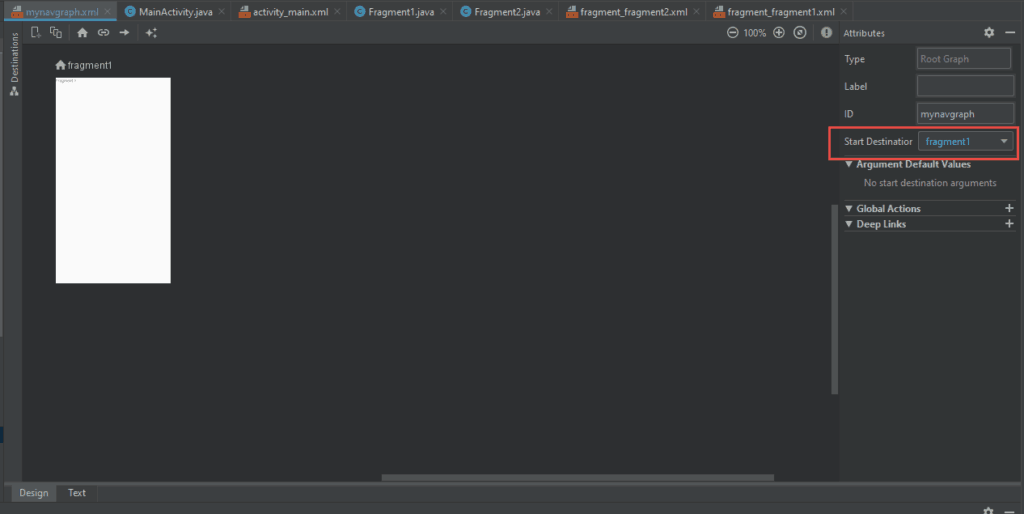
- Select the new destination icon and add fragment 1 to the Navigation Graph as a Fragment Destination
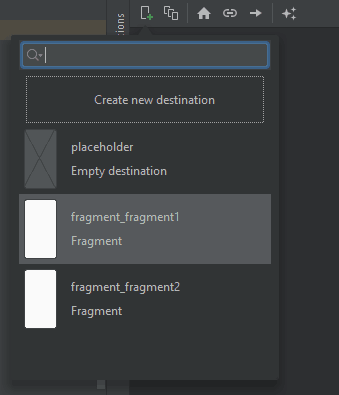
- Once fragment 1 has been added to the Navigation Graph, note that the Start Destination on the Navigation Graph has been set to fragment 1
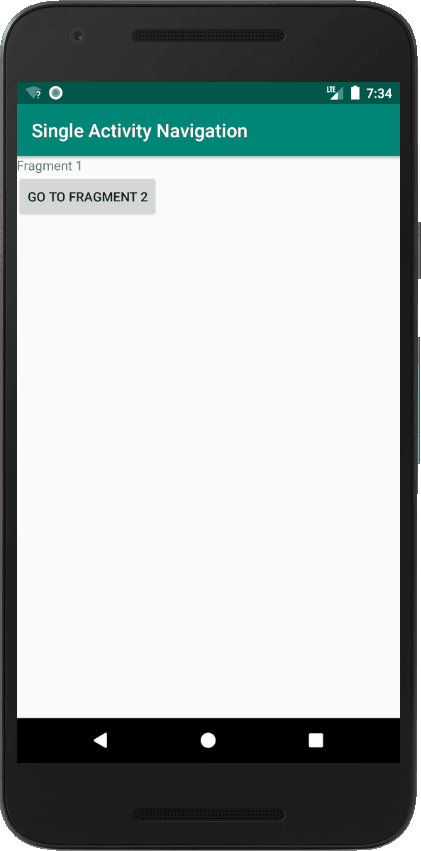
- Run your Android app to verify that the NavHostFragment is correctly showing fragment 1 on launch
- From there add fragment 2 to the Navigation Graph by following the same process as above
- At the end your Navigation Graph inside the Navigation Editor should look like the screenshot below
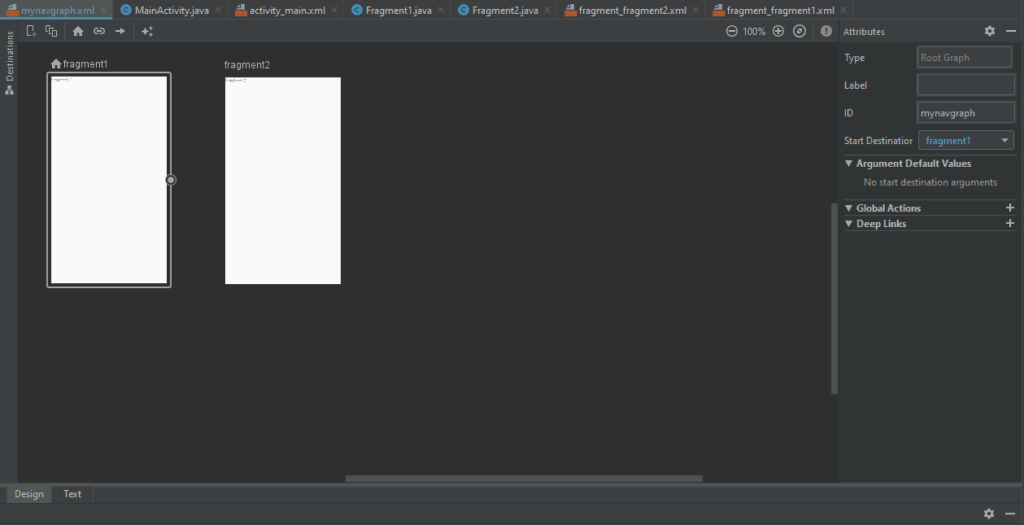
As you can see, the two Fragment Destinations inside the Navigation Graph are not currently linked, meaning there is no navigation pathway between these destinations. In the next step will cover creating a navigation pathway within the Navigation Graph using Actions.
Step 5: Creating Actions enabling navigation between Destinations in the Navigation Graph
Actions are used in the navigation architecture component to create a pathway between two destinations.
We will be creating one Action to be used to navigate from Fragment 1 to Fragment 2. This transition will occur on the selection of a button press inside Fragment 1.
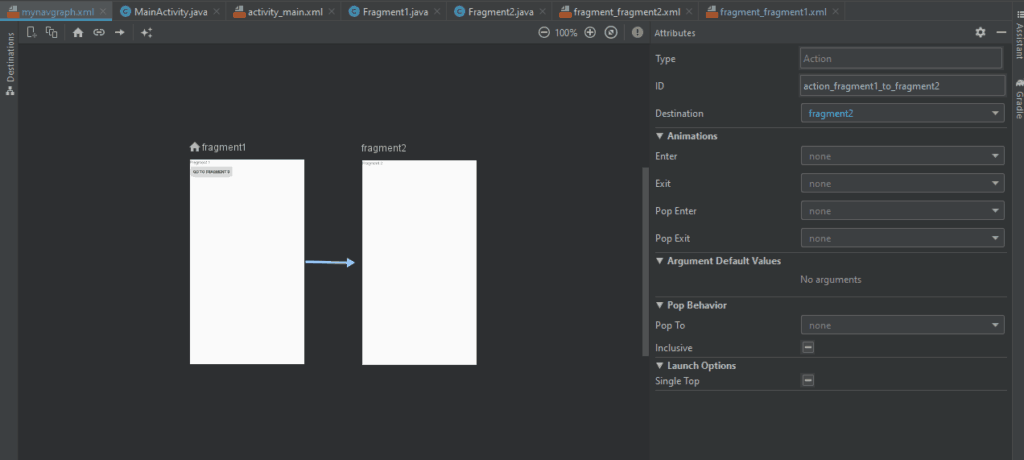
We will create the Action inside the Navigation Editor inside the visual editor in the Design tab. To do this first select fragment 1 in the Navigation Editor which should highlight the fragment in a blue border.

Then select the blue circle to the right of the fragment and drag the circle over fragment 2, then release it. This should create an Action and show an arrow pointing towards fragment 2 from fragment 1.
To make use of this Action to navigate between fragment 1 to fragment 2, in the next step we will wire up the button in fragment 1 to navigate the user to fragment 2 within the NavHostFragment when selected.
Step 6: Using the NavController to Programmatically Navigate Between Fragments
The NavController is used to navigate to a specific Destination within the navigation graph by referencing a Destination or Action.
In the Fragment 1 class we will make some changes to add an onClickListener to the button to used to navigate to Fragment 2.
Inside the onClickListener we will retrieve locate the NavController using the Navigation.findNavController(view) method, then call the navigate method and pass the Action reference to navigate to fragment 2.
See the following code sample in the Fragment1 class showing the navigation to Fragment2.
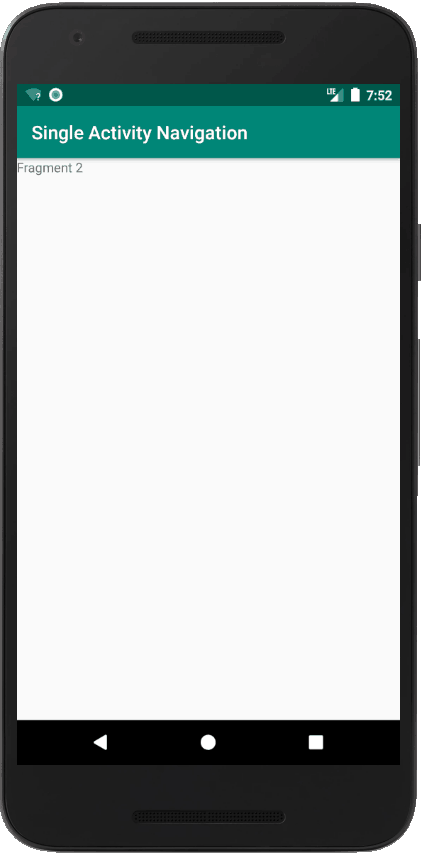
If you make these changes and run the app you will see the app is transitioned to Fragment 2 from Fragment 1. If you use the back button you will see it has been preserved and will take you back to Fragment 1.
All code samples from this tutorial are available in the GitHub repository linked below.
https://github.com/learntodroid/AndroidNavigationComponentTutorial