
The Google Play Store is a competitive place today for Android apps. When you are ready to release your app you want to make a great first impression and to get positive reviews from your users. Any bugs experienced by your users with your app will likely result in bad reviews and uninstalls which will have a negative impact on your app’s ranking in the Play Store.
In this article I will share with you how you can build quality into your apps by using various Android app testing frameworks to minimise the risk of users finding bugs in your app.
You can test your Android app before publishing to the Google Play Store using the following methods:
- Local Unit Tests using JUnit
- Instrumented Unit Tests using JUnit
- User Interface Tests using Espresso
- Distributing your app for Open, Closed or Internal Testing on the Google Play Store
At minimum you would want to use at least local unit tests, instrumented unit tests and user interface tests. I will explain in more detail below what each of these testing methods are, why they are important and how to use them to improve the user experience of your app.
Unit Testing in Android
Setting up for Unit Testing with JUnit 4
Before you write your tests you will need to make sure your app’s build.grade file contains the following dependencies in order to use JUnit 4 as well as some optional dependencies for Robolectric and Mockito.
dependencies {
    // Required -- JUnit 4 framework
    testImplementation 'junit:junit:4.12'
    // Optional -- Robolectric environment
    testImplementation 'androidx.test:core:1.0.0'
    // Optional -- Mockito framework
    testImplementation 'org.mockito:mockito-core:1.10.19'
}
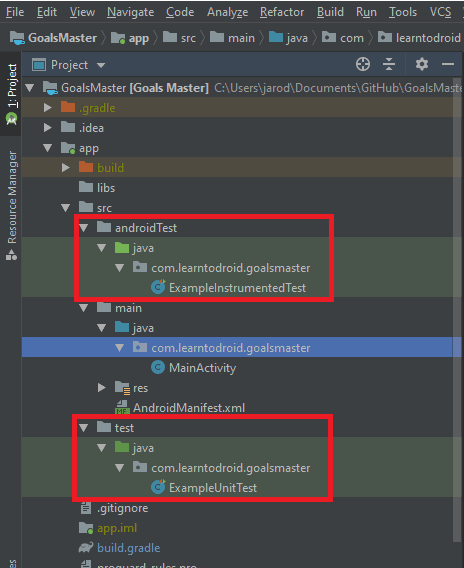
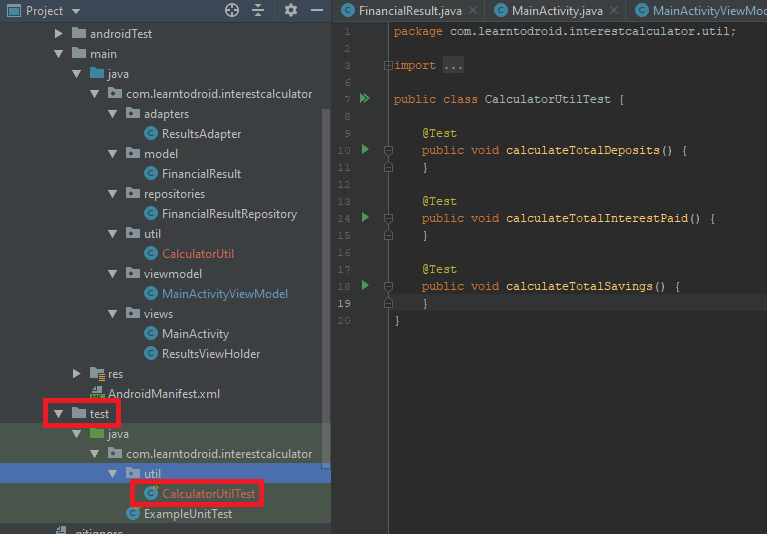
When you create a new project in Android Studio, in the project view you will see androidTest, test and main directories inside the app/src directory.
- The app/src/main directory contains your application code
- The app/src/test directory contains your local unit tests
- The app/src/androidTest directory contains your instrumented and end to end tests
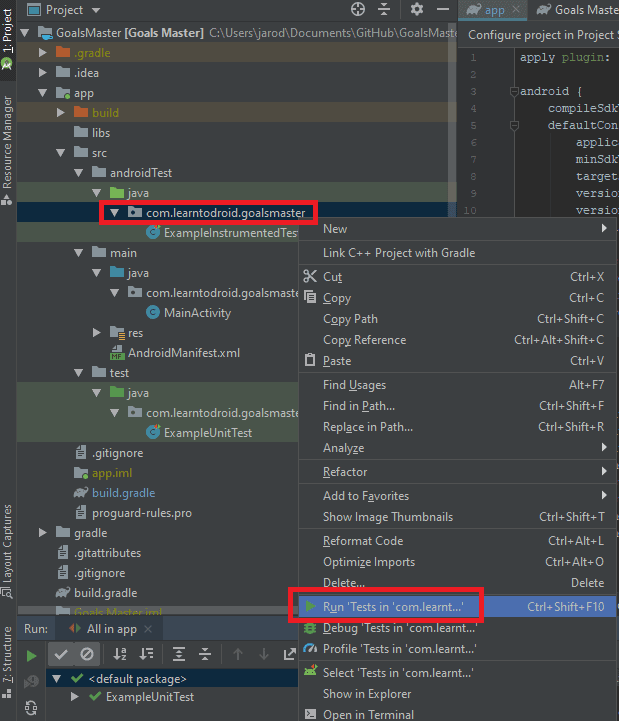
To run your instrumented tests, right click the package inside the androidTest directory, then select “Run Tests in <package name>”. These tests will then be executed inside the emulator.
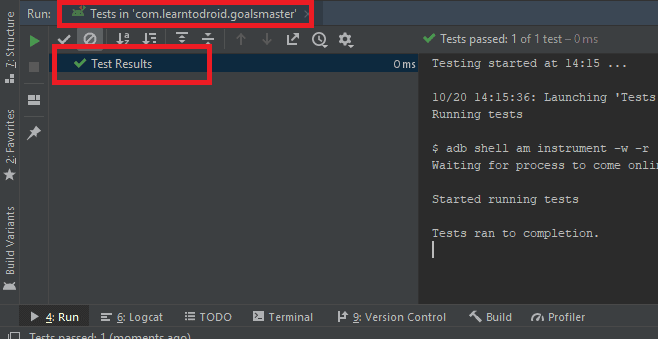
The test results for the instrumented tests will be visible within a tab in the Run results.
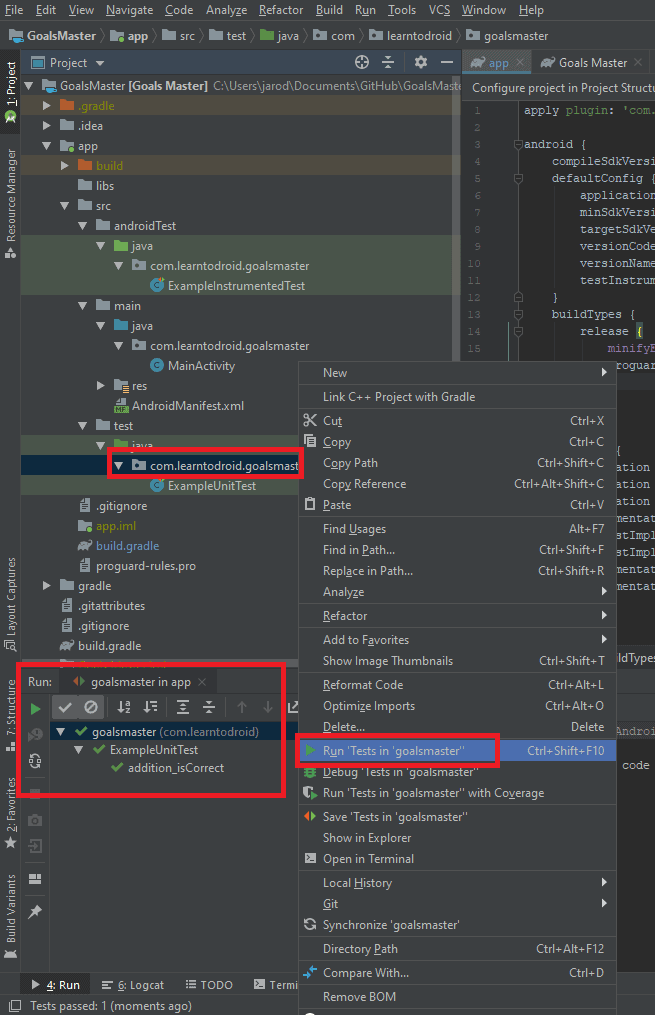
To run your local tests, right click the package inside the test directory, then select “Run Tests in <package name>”. These tests will then be executed within the IDE without requiring an emulator or real device.
Local Unit Tests using JUnit 4
Local unit tests are run on your local machine within the Java Virtual Machine. They are run inside the Android Studio IDE and they do not require an emulator, virtual or real device to run. These tests run very fast and they are limited to testing logic within your code. It will not be able to test Android specific functionality such as Activities, Fragments, etc.
JUnit 4 and Mockito are testing frameworks that can be used to write local unit tests. For the scope of this tutorial we will be using JUnit 4, before you write these local unit tests make sure JUnit 4 is added as a dependency in your app’s build.gradle file as covered in the Setting up for Unit Testing with JUnit 4 section.
To generate a test class where you will write your local unit tests in Android Studio:
- Highlight the method name within the class you want to make a Local Unit tests for
- Right click the method name
- Select “Generate”
- Select “Test…”
- (Optional) Update the test class name
- Check the set of methods you want to create tests for in the new test class
- Select the “OK” button
- Select the test directory
- Select “OK”
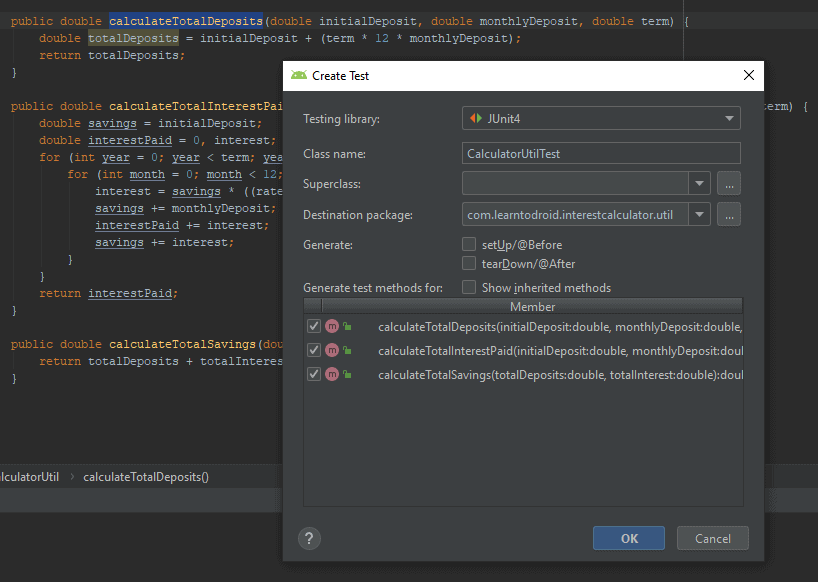
The test class generated will a test method for each of the methods you selected in the “Create Test” dialog.
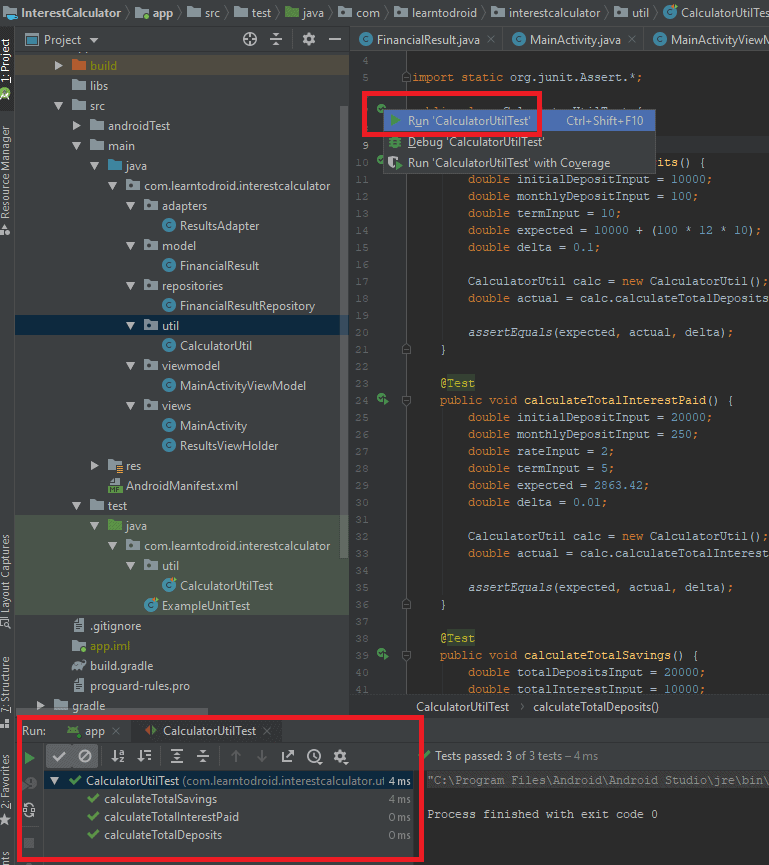
The code snippet below from the CalculatorUtilTest class, available in the InterestCalculator GitHub repo, shows how to use to test the expected value of a method against the actual value calculated through the use of an assert statement with a small margin of error using a delta value.
To run these local unit tests in Android Studio, select the green icon to the left of the test class name and select “Run CalculatorUtilTest”. This will run all of the tests and show the results in panel at the bottom of the IDE.
Instrumented Unit Tests
Instrumented unit tests are run on on a virtual device within an emulator or a real device. These tests run slower than local unit tests and they can test Android specific functionality such as Activities, Fragments, Services, etc.
JUnit 4 and Mockito are testing frameworks that can be used to write instrumented unit tests. Roboelectric is a testing framework that allows you to test instrumented tests without a device.
For the purposes of this tutorial I will be creating a small number of instrumented unit tests in JUnit 4 to test that specific contents in the user interface are present for the MainActivity.
See the MainActivityTest class below, from the InterestCalculator repo, which contains some instrumented unit tests for the MainActivity.
These tests use both JUnit 4 and the Hamcrest library for matchers to test the when the MainActivity is used that it:
- Includes a TextInputLayout for the initial deposit, monthly deposit, interest rate and term
- Includes a Button for calculating the interest
- Has a RecyclerView with no items
To run these instrumented unit tests in Android Studio, select the green icon to the left of the test class name and select “Run MainActivityTest”. This will run all of the tests using the emulator and show the results in panel at the bottom of the IDE.
User Interface Testing using Espresso
What is Espresso?
For more advanced tests requiring the Android device, you will want Espresso, a user interface (UI) testing framework for Android.
Espresso is a UI automated testing framework for Android which allows you to test interactions with the user interface elements within your app then verifying the app behaves as expected.
To create UI tests in Espresso you will be using View Matchers, View Actions and View Assertions.
View Matchers are used in Espresso to locate UI elements on screen. View Matchers are provided to the onView() method as parameters. Some example View Matchers include:
- withId(…)
- withText(…)
- withHint(…)
- allOf(…)
- anyOf(…)
View Actions are used in Espresso to perform interactions against UI elements. View Actions are provided to the perform() method as parameters. Some example View Actions include:
- click()
- doubleClick()
- longClick()
- typeText(String)
- replaceText(String)
- clearText()
- scrollTo()
- swipeLeft()
View Assertions are used in Espresso to check the UI elements match a particular state after the changes are made. View Assertions are provided to check() method as parameters. Some example View Assertions include:
- mactches(Matcher)
- doesNotExist()
- isLeftOf(Matcher)
- isRightOf(Matcher)
- isAbove(Matcher)
If you are looking for other View Matchers, View Actions and View Assertions that are available for Espresso, a great resource is the cheat sheet released on developer.android.com which is also available in pdf format.
Setting up Espresso
To use Espresso you will need to add the following dependencies into your app build.gradle file.
dependencies {
  androidTestImplementation 'androidx.test.espresso:espresso-core:3.2.0'
  androidTestImplementation 'androidx.test.espresso:espresso-contrib:3.1.0'
  androidTestImplementation 'androidx.test:runner:1.1.0'
  androidTestImplementation 'androidx.test:rules:1.1.0'
}
In the same build.gradle file you will also need to include the AndroidJUnitRunner for the test instrumentation runner inside the defaultConfig:
android {
  ...
  defaultConfig {
    ...
    testInstrumentationRunner "androidx.test.runner.AndroidJUnitRunner"
    ...
  }
  ...
}
Using Espresso
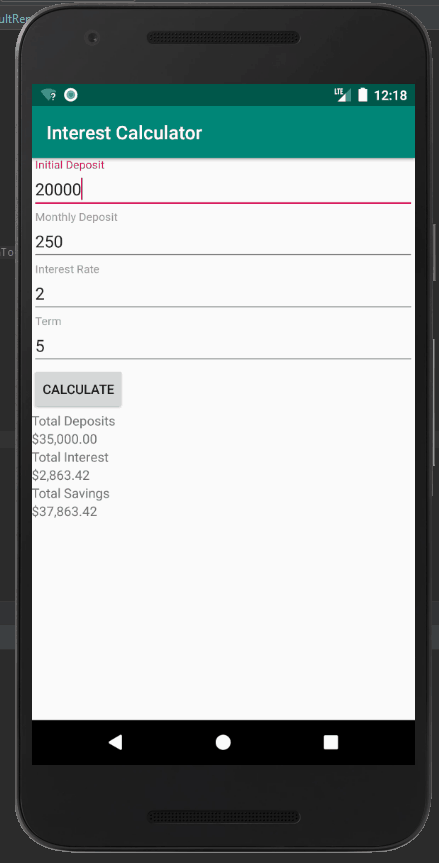
We will be using Espresso to test the Interest Calculator app user interface which is made up of:
- Multiple TextInputLayout and TextInputEditText for capturing inputs to the calculator
- A Button that triggers the calculation on selection
- A RecyclerView to display the calculated results of the Total Deposit, Total Interest and Total Savings
Below is an excerpt from the MainActivityEspressoTest.java class available for you to clone in the InterestCalculator repo created for this tutorial.
- Espresso tests are instrumented tests as they rely on the Android device or virtual to test, so they need to be placed inside the src/androidTest directory
- Using Espresso, each of the TextInputEditText will be located using onView(withId(…))
- After locating each TextInputEditText in the UI, they will be selected and overridden with new values typed into the onscreen keyboard, using perform(click(), replaceText(String), closeSoftKeyboard())
- Then we will use Espresso to check that the correct values have been typed into the EditText using onView(withId(…)).check(matches(withText(String)))
- We will use Espresso to select the Calculate Button and will verify the correct number of items were added to the RecyclerView and that the results at specific positions are the correct label
Manual Testing through the Play Console
You may also what to distribute your app to a limited audience to test your app prior to distributing it to the general public. The Play Console does have some options available you to do this.
The Play Console allows you to distribute your app for an open test, a closed test or an internal test.
If you would like to learn more about setting up open, closed or internal tests check out this Google Support page.